The following short tutorial demonstrates two additional SOA components:
Human tasks and Business rules.
The screenshots are not current,
so you may find discrepancies between them and your development software.
Table of Contents
User tasks
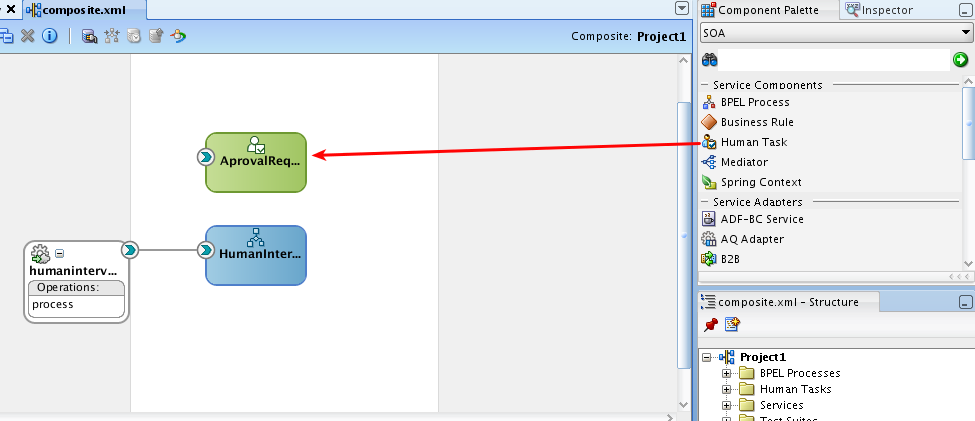
- Create a new **Asynchronous** BPEL process named HumanIntervention which receives a string as input.
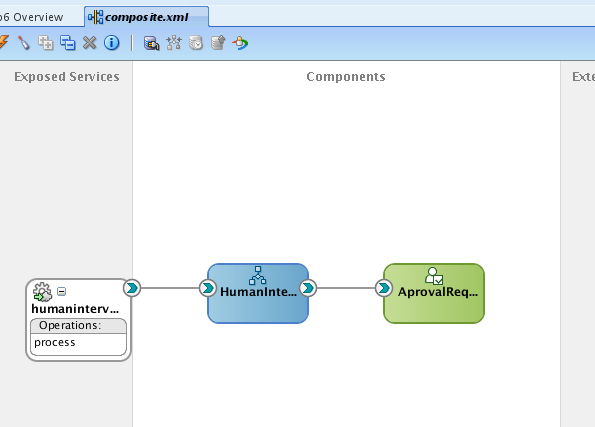
- Drag a Human Task Component from the SOA Component Palette to the **composite** view.
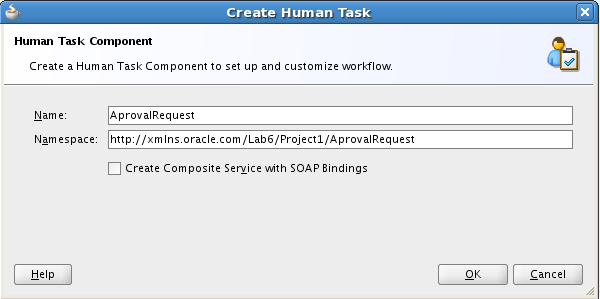
- Name the human process as ApprovalRequest
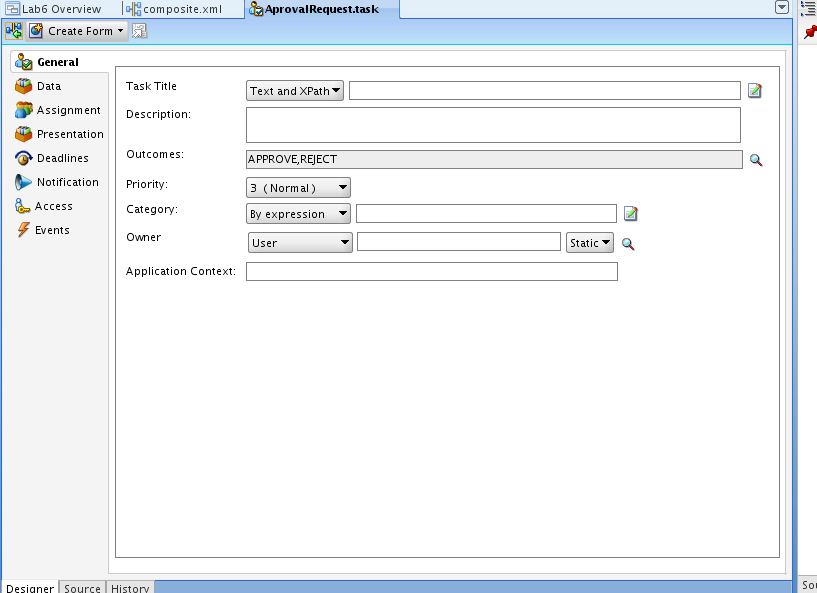
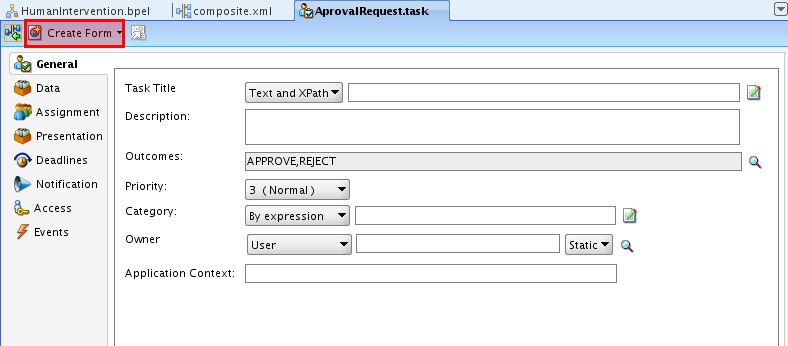
- Double-click on the LeaveRequest task tab. This will open up the task definition form as a new tab within JDeveloper.
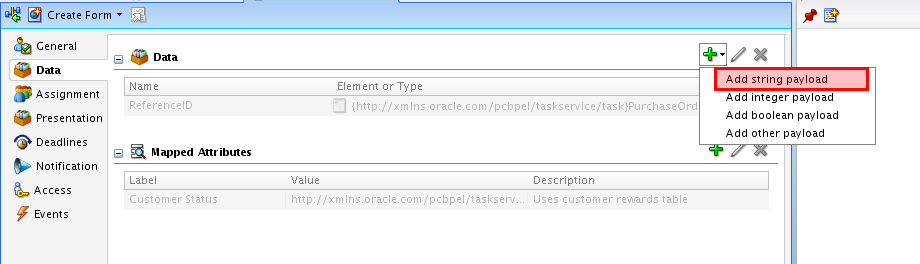
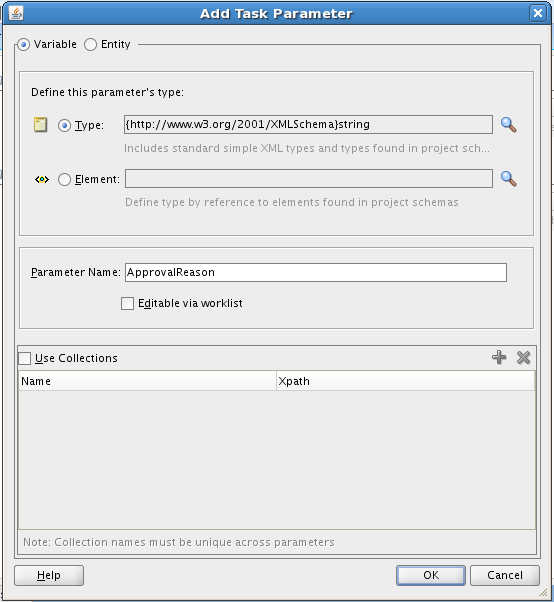
- Change to the Data Tab and create a string payload.
- Name the Parameter as Approval Reason.
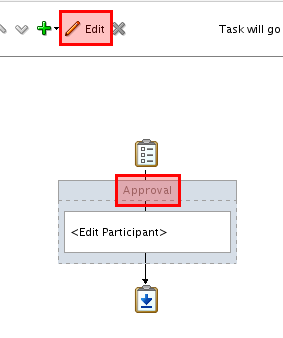
- Select the assignment tab and change the stage name to approval by clicking on the edit button.
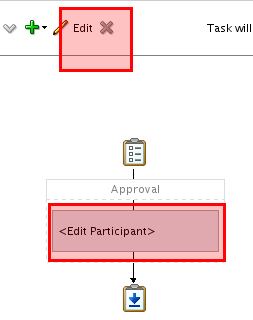
- Now choose *edit* participant and click the edit button.
- In the new participant window, add a new user.
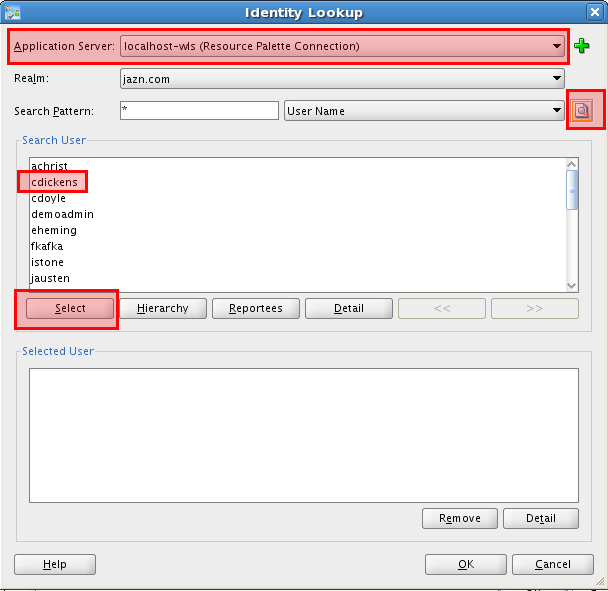
- Choose the participant name clicking on the three points button.
- Change the Application Server to the localhost-wls connection. Do a search and choose the cdickens user. **Click** the select button.
- Close the task window to save the new task. (Or you can click the save all button).
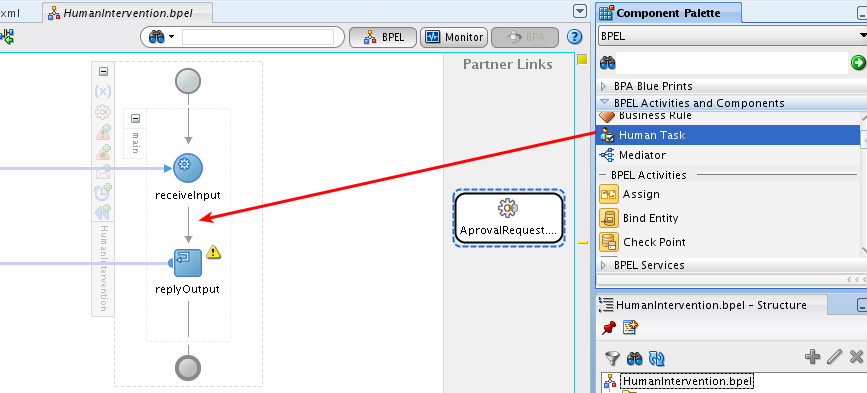
- Connect the created BPEL process with the new user task.
- In the new BPEL process, drag a new user task shape to the bpel process.
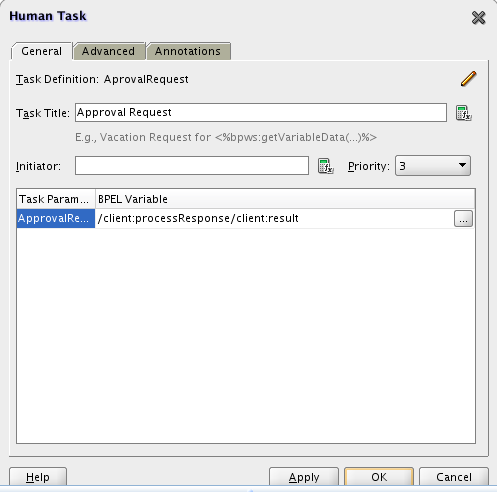
- Open the user task component. Edit the Task Title to "Approval Request". Leave the initiator field blank. For the task parameter choose the result element of the input variable of the web service.
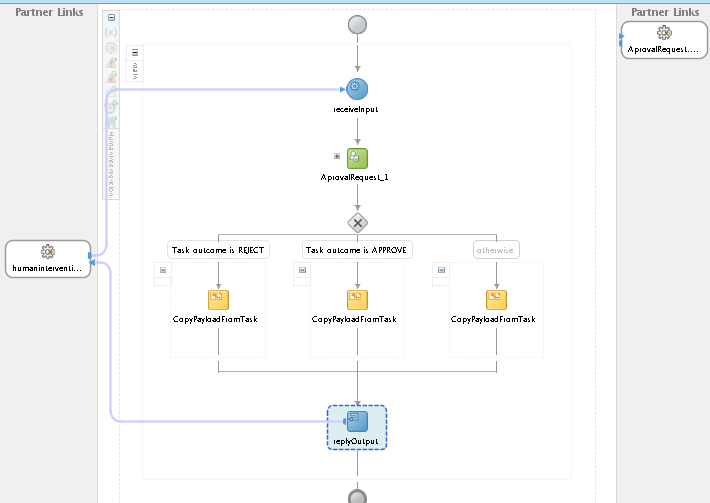
- Your BPEL process should now look like the following image. Deploy the composite to the server as in previous lessons. Correct any errors you may have deploying.
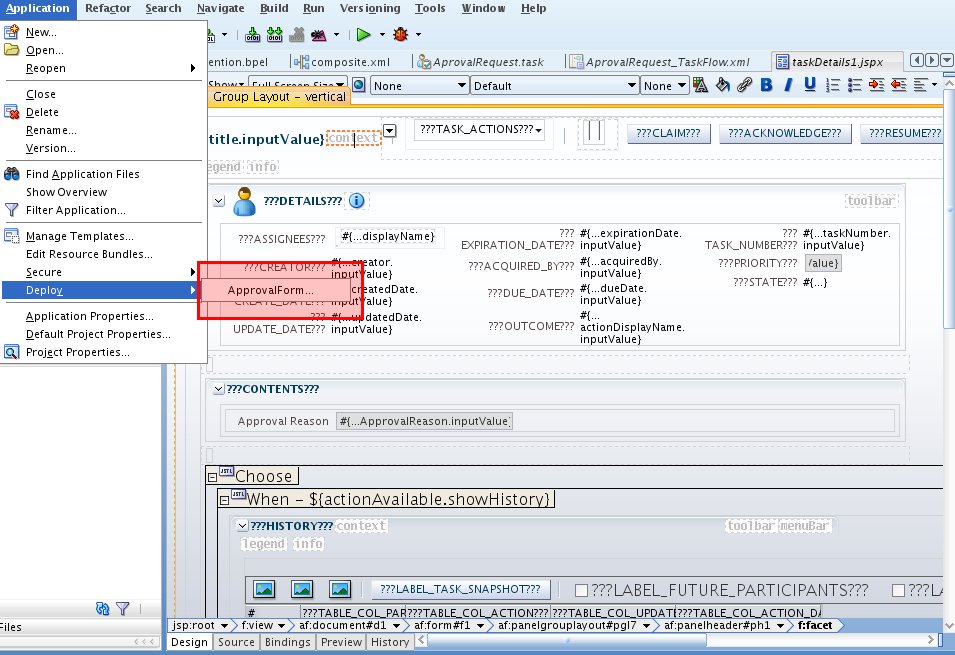
- Go to the composite.xml view and open again the user task. Click on the create form button and select auto-generate task form.
- Name the new project as ApprovalForm and click ok. (slower computer must wait some time before proceeding to the next step)
- As you can see, there is a HTML page representing a form for the request. To publish the form click Application->Deploy->ApprovalForm.
- Choose Deploy to Application Server->localhost-wls.
You can leave the option to deploy to all instances in the domain (as there is only one). Finish the deploy form. Wait. - In a browser go to: http://localhost:7001/em
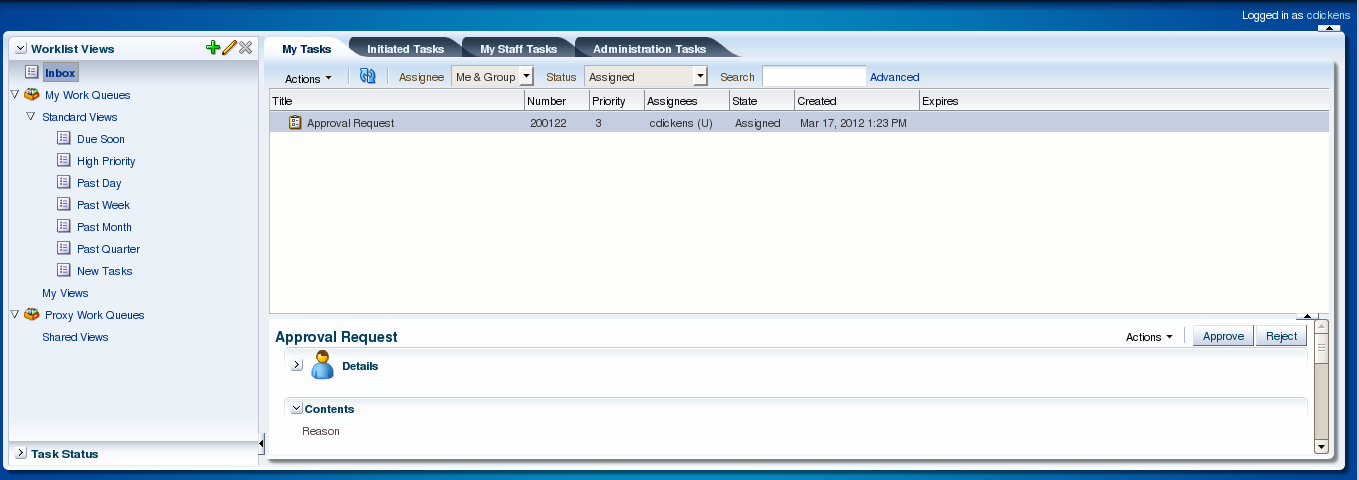
and test the new service as in previous lesson. Note that the instances created are still running with a conversation_id. - Now open a new browser tab at: http://localhost:7001/integration/worklistapp.
Login with cdickens:welcome1. - Note the instances pending for authentication.
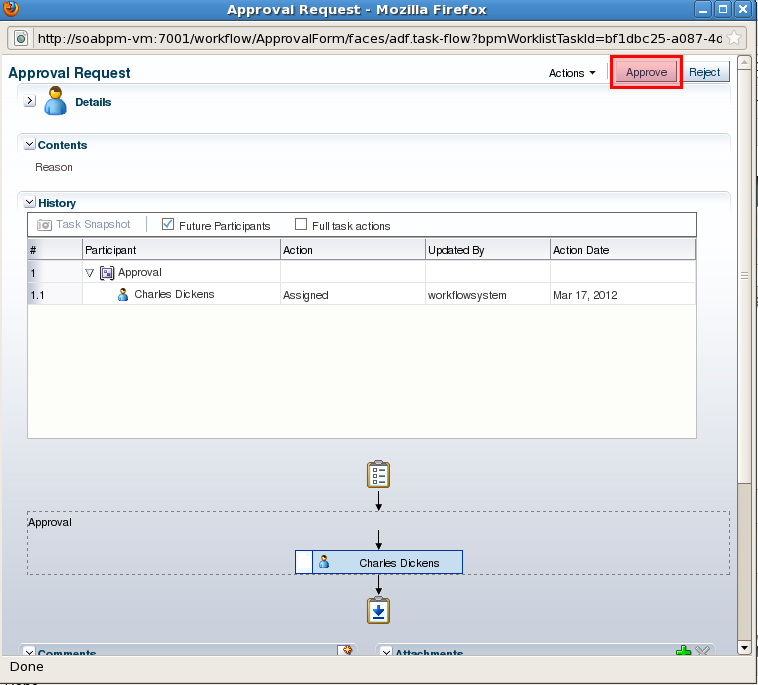
- Click on the instance and approve.
- Note where the errors occurred and correct them. Hint: Look at the assignments. Try to change the input to /task:task/task:systemAttributes/task:outcome.


Business rules
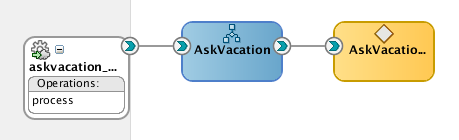
- Create a new **synchronous** BPEL process named AskVacation which receives an integer and outputs an integer.
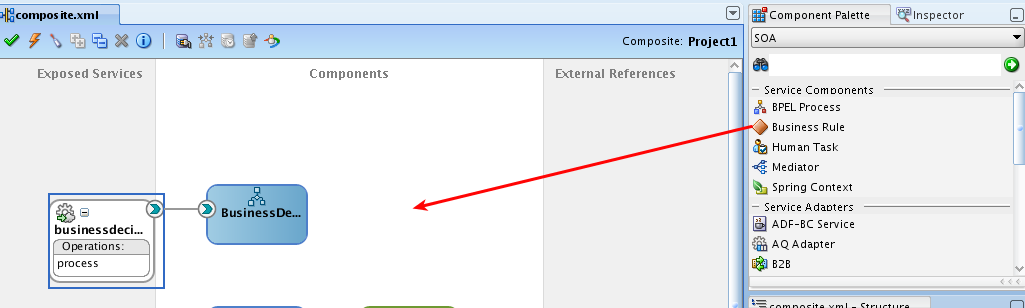
- Drag a Business Rule component in the composite view.
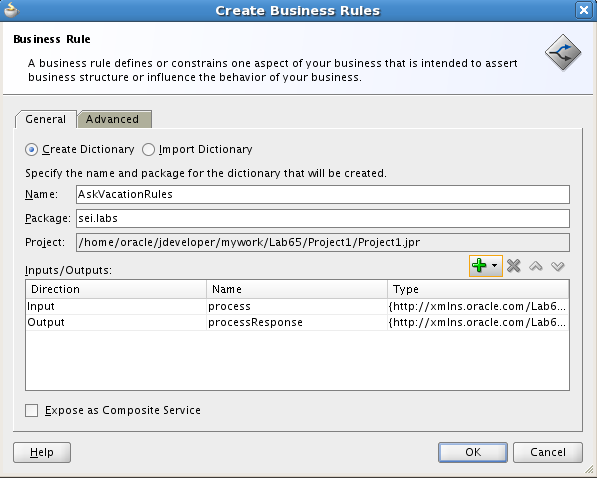
- Create a business rule names AskVacationRules, which has has input the input variable of the webservices. The output should be the output of the webservice.
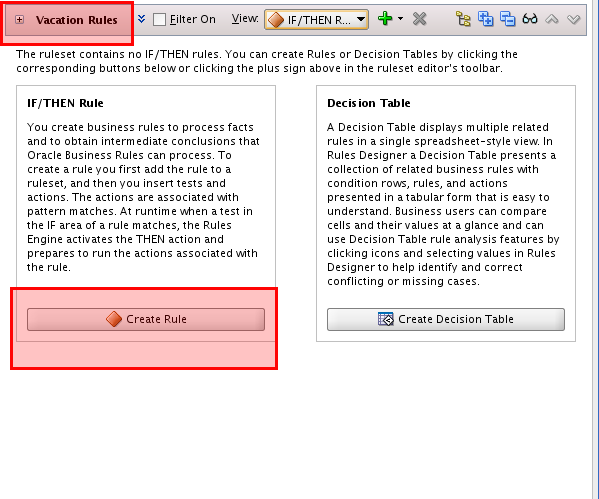
- Edit the create business rule by double clicking on the shape. Rename the rule and create a new rule.
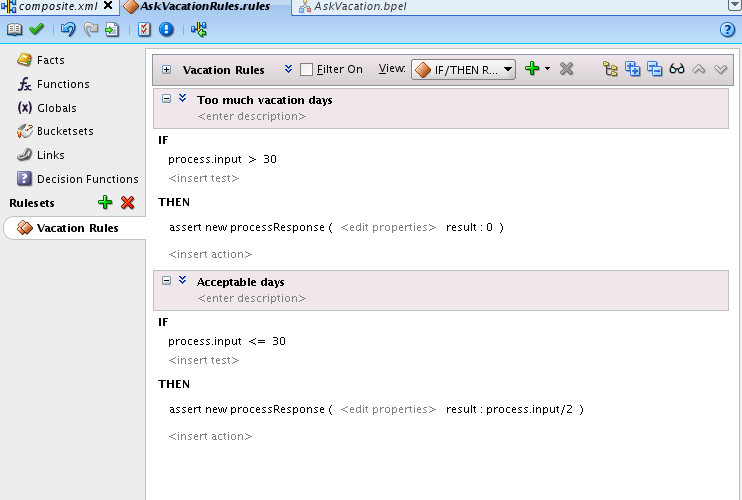
- Create two new if-then rules as shown in the following image.
- In the composite view connect the new bpel process with the new business rule
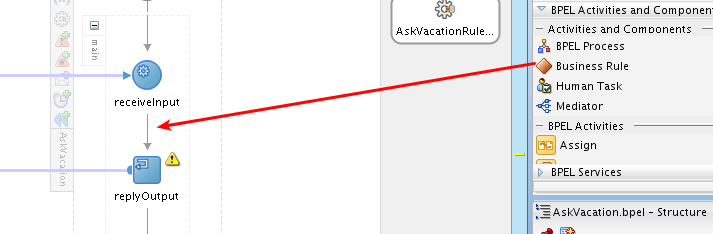
- In the AskVacation.bpel drag the business rule.
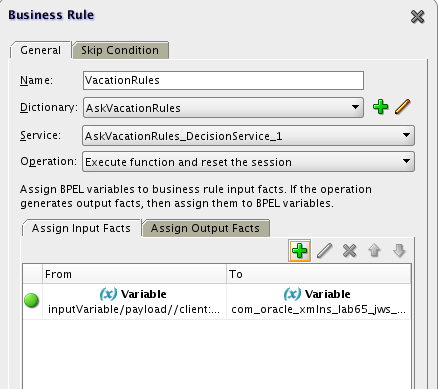
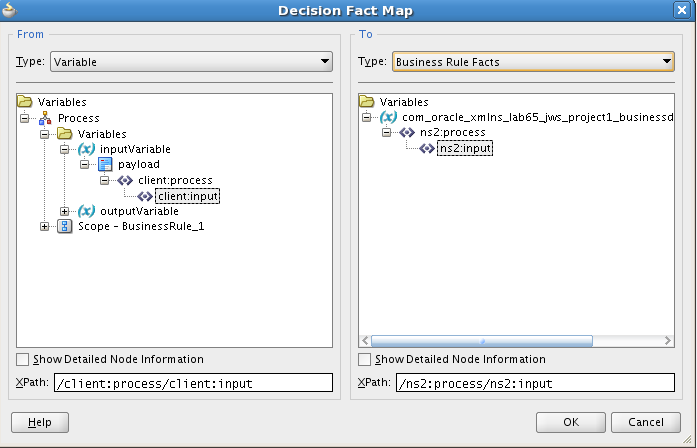
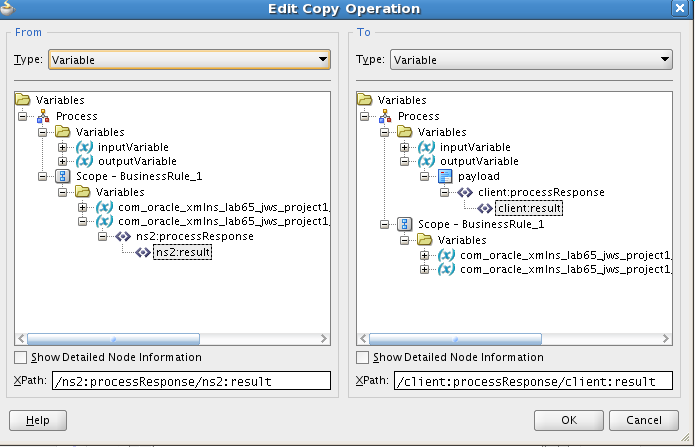
- Name the rule as VacationRule. Fill the input and output facts. You must double click the Business Rules Fact to see them.
- Deploy and test the service.
- Later, try to use bucket sets and decision tables to easily change business rules.
References
- Antony Reynolds, Matt Wright, "Oracle SOA Suite 11g R1 Developer's Guide - Develop Service-Oriented Architecture Solutions with the Oracle SOA Suite", Packt Publishing, June 2010 pp. 131 - 272